What is Ap.setup?
Ap.setup is the URL used to access the setup interface of the Wavlink range extender. Go through the given guide to set up new extender yourself.
How to Setup Wavlink Extender through Ap.Setup?
To set Wavlink Extender through ap.setup; follow the steps given below:
Step 1: Physical Setup
- Position the extender to the place where you face slow internet.
- Make sure that the placement of the extender should be in the router’s range.
- Connect your extender to the router via an Ethernet cable.
- Power up the extender. (you can plug it directly into the power socket)
Step 2: Connect to Extender
- Connect your computer or mobile device to the extender with an ethernet cable.
- You can also connect the device wirelessly by using the default network named Wavlink_XXXX.
- After that, use an updated web browser and insert ap.setup into the address bar.
- Press enter and go to the login page of the extender.
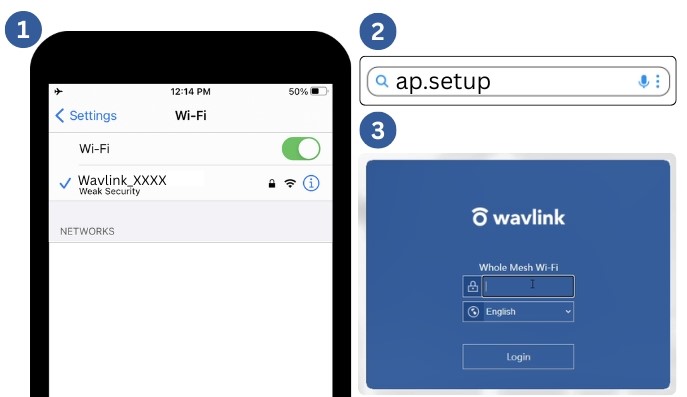
Step 3: Login to Extender
- Once you reach the login page, here enter the default username and password.
- If you do not know the default credentials, then check out the label of the extender.
- You can also find the default login credentials in the user manual.
- After filling the login credentials, click on the Login button and go to Setup Interface.
Step 4:Final Setup
- When you enter the Setup Interface, here click on the Wizard option and select WiFi Range Extender.
- If you want to set the extender in AP Mode, then select the AP Mode option.
- A list of networks will open, here select the WiFi network and enter the password that you want to extend.
- Now set a new SSID and password for the extender and click on the Connect button.
Wavlink Extender Setup via WPS Button
There is also an alternative method to setup the Wavlink extender, i.e. via WPS Method. Here you don’t need to use an ethernet cable or ap.setup to connect the extender to router. Refer below detailed steps for Wavlink extender setup via the WPS button.
Step 1: Position the Extender
- Place the extender along with the existing router.
- Plug the extender into the wall socket directly.
Step 2: Press the WPS Button to Connect
- After powering the extender, push the WPS button of the router first.
- Within 2 minutes press the WPS button of the Wavlink extender.
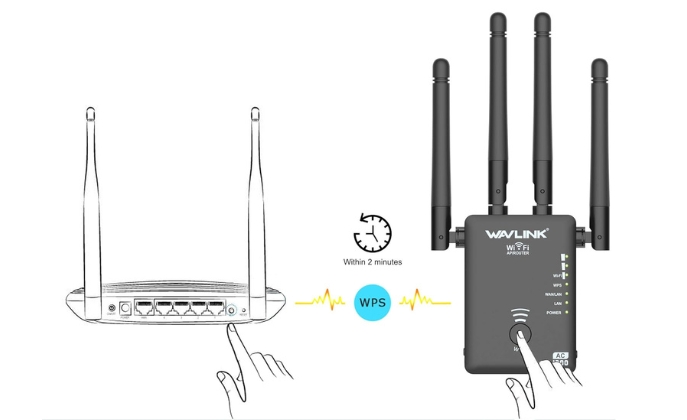
Step 3: Check for LED Light
- When you press the button, check if the light starts to blink on the extender.
- Now, wait till this light turns to the solid color.
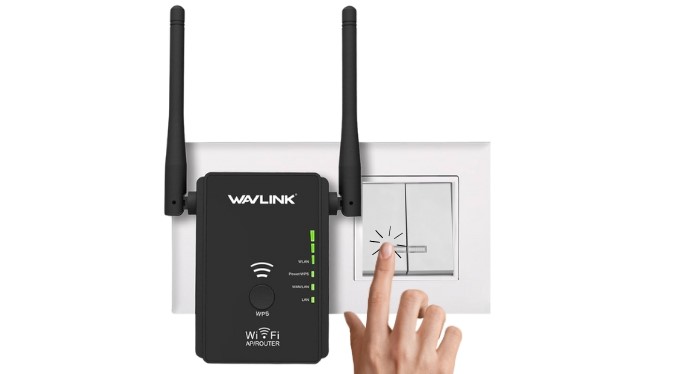
Step 4: Move the Extender
- Once the light turns solid, it shows that the extender is successfully connected to the router.
- Move the extender to the place where you might have slow internet speed.
Note: If you are using WPS method, then it is your choice if you want to configure the extender via web interface ap.setup; because in this case the extender inherits all the custom settings of the router automatically.
Ap.setup Troubleshooting Tips
There are various common issues that users might encounter while using ap.setup. Here are some troubleshooting tips to help you resolve them:
Check Physical Connection
- Make sure the extender gets proper power supply.
- All network and power cables are in good condition.
- Restart and reset the extender.
- Ensure extender is properly connected to the router and router to a modem.
Check Browser’s Settings
- Don’t use an outdated web browser to login. Always use an updated one.
- Before login, clear all the cache and cookies of the browser.
- Else, use a different browser to login.
- Temporarily Disable Antivirus Software.
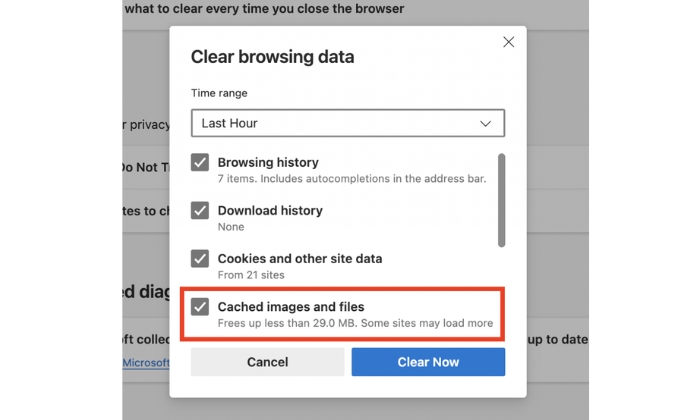
Tips for Successful Login
- Use correct URL ap.setup to access the login page.
- Enter correct login credentials to login to the Extender.
- Make sure your login device is connected to the extender.
- If you forget password, then reset your extender and login again.
Restart or Reset Extender
- Restart your device to resolve minor technical issues.
- If the problem still exists after using the above steps, then reset the extender.
- To reset, press the reset button of the extender for 10-15 seconds.
- Wait till the light on the extender turns solid.
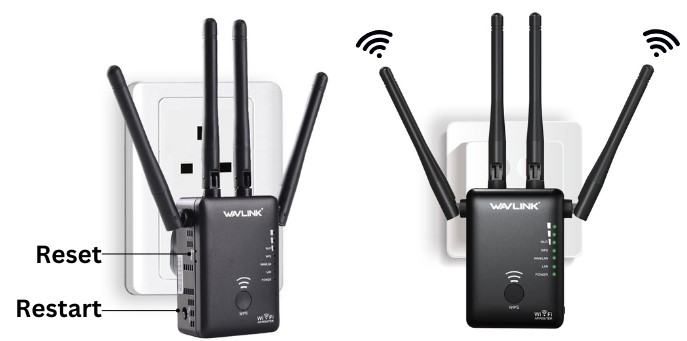
By following above tips, you can effectively troubleshoot the ap.setup issues that may arise during the setup or login process. Even if after trying our self-help guides and easy-to-follow tips; you are not able to configure the device using ap.setup. We recommend you to contact Wavlik Network support to immediately resolve technical issues.
Frequently Asked Questions (FAQs)
What should I do if I forget my Wavlink extender ap.setup login password?
If you forget your login password, then reset your extender. After reset, again login using the default password.
Can I use the Wavlink extender without an Ethernet cable?
Yes, you can use a Wavlink extender without an ethernet cable. Configure your extender via web interface and connect your devices wirelessly to the extender.
How do I know if the Wavlink extender is connected successfully?
When the blinking LED light on the extender turns solid; it indicates your extender is connected to the network successfully.
What is the maximum range of Wavlink extender?
The range of the extender depends on the model of the extender. But typically it can extend your network coverage to 200m or 300m.
Why is my internet speed still slow after setting up the extender?
If you are facing slow internet speed, then there can be different reasons behind it:
- Distance from the router.
- Interference from other devices.
- Network congestion.
If you are facing these, then relocate your Wavlink extender within the range of router.
Is it possible to connect multiple devices to the Wavlink extender?
Yes, you can connect multiple devices to the Wavlink extender easily. But also keep in mind that too many devices may affect the performance.
Can I use the Wavlink extender with any router?
Yes, you can use the Wavlink extender with any router. Just configure it properly to the router.
How often should I update the firmware of my Wavlink extender?
To update the firmware of the extender, steps are:
- Go to Advanced Settings on web interface.
- Select the option Upgrading Firmware.
- And download the latest firmware updates.
