Wavlink Admin Login Explained: Beginner Friendly Tutorial
Wavlink refers to a brand well-known for manufacturing routers and extenders, which are used by people in their homes or offices to receive a reliable internet connection throughout the area.
However, once you have your device, it needs to be setup by logging in to the admin panel. This panel helps you Wavlink login and explore other settings.
Wavlink admin login, also known as the Wavlink router login or Wavlink web management page, acts as the control room of your router. This individual platform provides you access to all the settings of your Wavlink network.
What is Wavlink Admin Panel?
Wavlink Admin Panel also known as control room, is a small built-in software present inside the router that allows you to access various settings of your Wavlink device. No internet connection is required to reach this panel. You can reach this panel by connecting your router with your device via WiFi or provided ethernet cable.
Admin panel provides access to:
- Changing WiFi name (SSID)
- Setting new passwords
- Adding guest Wifi network for visitors
- Have a look at all the connected devices to your network
- Do port forwarding, firewall, DMZ, parental control
- Firmware updates
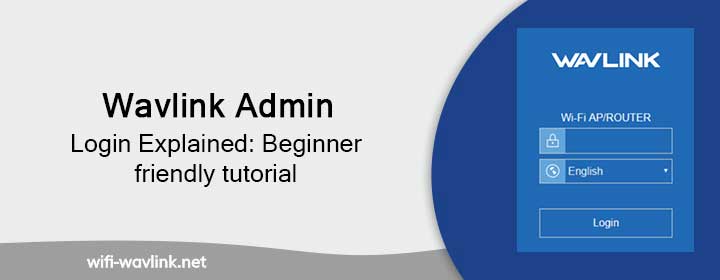
How to do Wavlink Admin login?
After router setup is done, next step is Wavlink admin login. The following part explains completely, how admin login is done in the simplest way so even non-tech people can manage their internet connection properly.
- Connect your device to the router via WiFi or ethernet cable. (If the router is new, use the default credentials provided on the router’s label)
- Open any web browser (Chrome, Safari, Microsoft Edge) on your device.
- Type the URL: wifi.wavlink.com or IP address: 192.168.10.1 in the address bar of the browser.
- You’ll reach a login dashboard.
- Now, enter credentials (username & password), usually it is “admin” for both. (**If it is not admin, check on the label of the router).
- Tap “Login” and you’ll enter “Admin Panel”.
Here, you’ll see all the tabs such as wireless, LAN, WAN, status, system tools, etc.
Why is the Wavlink login process useful?
Given below is the brief discussion of how each tab is useful:
Wireless settings
It allows you to change the Wi-Fi network name (SSID) to anything you choose, and set a new, secure password. If your model is dual-band, you can also choose between the 2.4GHz and 5GHz bands.
Guest WiFi
You can turn it “ON” to allow the separate network access to the visitors. This will give them network access for limited time or limited speed.
Connected Devices
This allows you to keep a check on all the users of the network and block unknown or unwanted devices.
Parental Control
With this feature you can block internet access to various websites you feel are not fit for your kid’s usage. It also allows you to limit internet to your child’s device. For instance: turning off internet after 9PM, etc.
Firmware Update
You can check for the updates in the router by logging into wifi.wavlink.com. Keeping the router updated also helps in maintaining speed and security of the connection.
Additional Tips for New Wavlink Users
While doing a Wavlink login, there are some settings that would enhance the performance of your WiFi. Here are the tips to follow:
1. Change Wavlink login username & password.
Change the admin login password, i-e, “username: admin & password: admin” by default. Anyone with access to this can change the settings. After logging in, navigate to system tools and in password settings. Change the password. (Note: This is not your WiFi password, it is for control panel of the router).
2. Avoid the use of WPS
WPS button allows the router to connect without password, making it easily hackable by unknown resources. Therefore, its better to disable the WPS after setup is done.
3. Turn ON Firewall
Locate firewall settings inside admin panel and turn in ON. This blocks internet traffic and protects your devices connected to WiFi.
4. Check Device List Often
Make a habit of checking the “connected devices” list often to see if any unknown phones, laptops or TVs are connected. If you find an unknown source stealing your WiFi, block them.
5. Update Firmware Time to Time
Just like your phone requires a software update, similarly router also need update. It helps you fix bugs, add new features, provide better speed and safety to your network.
Good work! Here we reach the end of this guide. We hope that the question, “How to do Wavlink login in simple steps?” was answered appropriately. Not only this, the blog also provided knowledge on why the login is useful, followed by some additional tips for the new users.
Incase you still face any issues feel free to reach out to us!
Frequently Asked Questions
What is the default login username and password for Wavlink?
Most Wavlink devices come with default:
- Username: admin
- Password: admin
(Else, you can check the label under your router. Some models may have different password.)
What is the IP address for Wavlink login?
It is: 192.168.10.1. You can also use URL: wifi.wavlink.com.
Can Wavlink login be performed without internet?
No, internet is required because the login has to be done through web browser that requires an internet connection. You can provide that by connecting Wavlink’s router via Wi-Fi or ethernet cable.
What shall I do if I forgot my login password?
If you’ve changed the password and forgot, do a reset:
- Press and long press the reset button for about 10-15 seconds given at the back of router.
- It will restart and return to default settings
- Login again using default credentials.